


Welcome to the Apilo Help Center.
Order Manager 3.0 – organizing work
Contents
Order List and General Settings:The order list in Apilo is a functionality that allows for efficient and convenient management of orders. It enables you to filter, change statuses, perform bulk actions, generate labels, and much more. Thanks to this, you can quickly assess what stage each order is at.
Orders can be accessed in the Orders > Order List tab: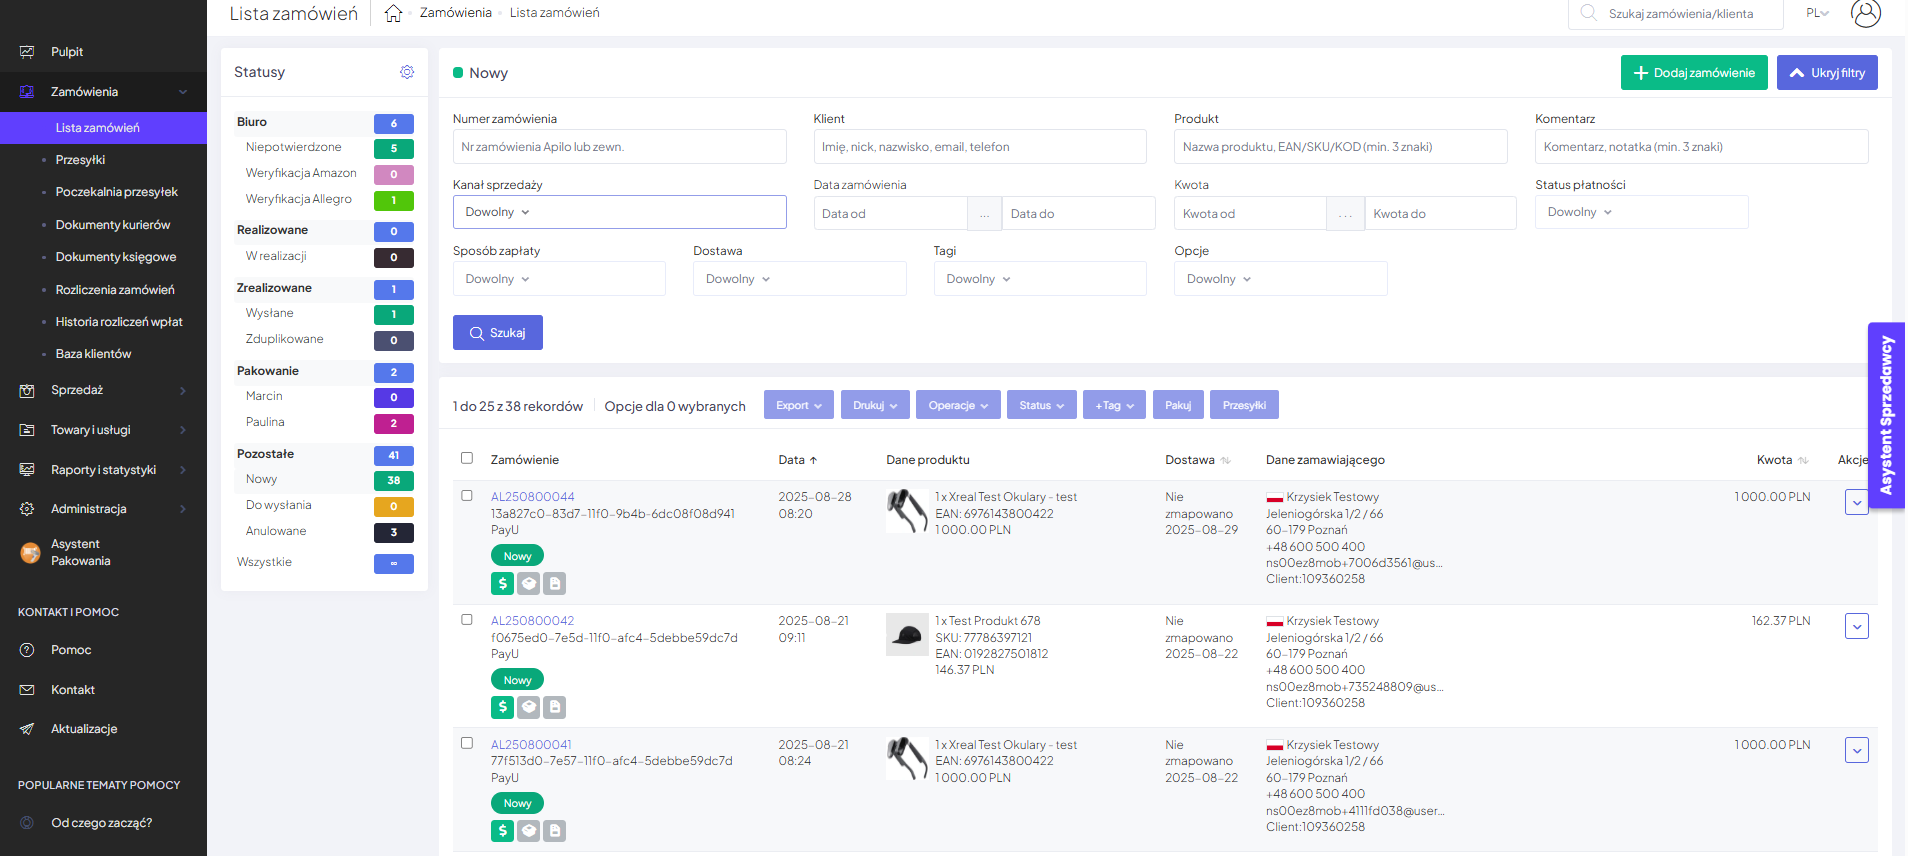 The status and groups of orders are visible as a separate column to make order processing even more intuitive and clear.By clicking the gear icon in the top right corner of the “Status” column, the system will automatically redirect you to the tab allowing you to create new groups and order statuses according to your own preferences:
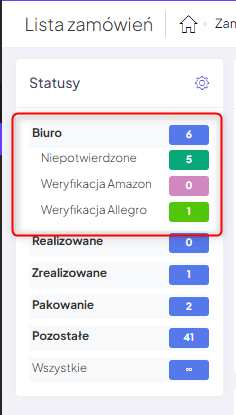
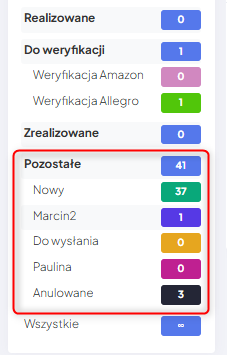
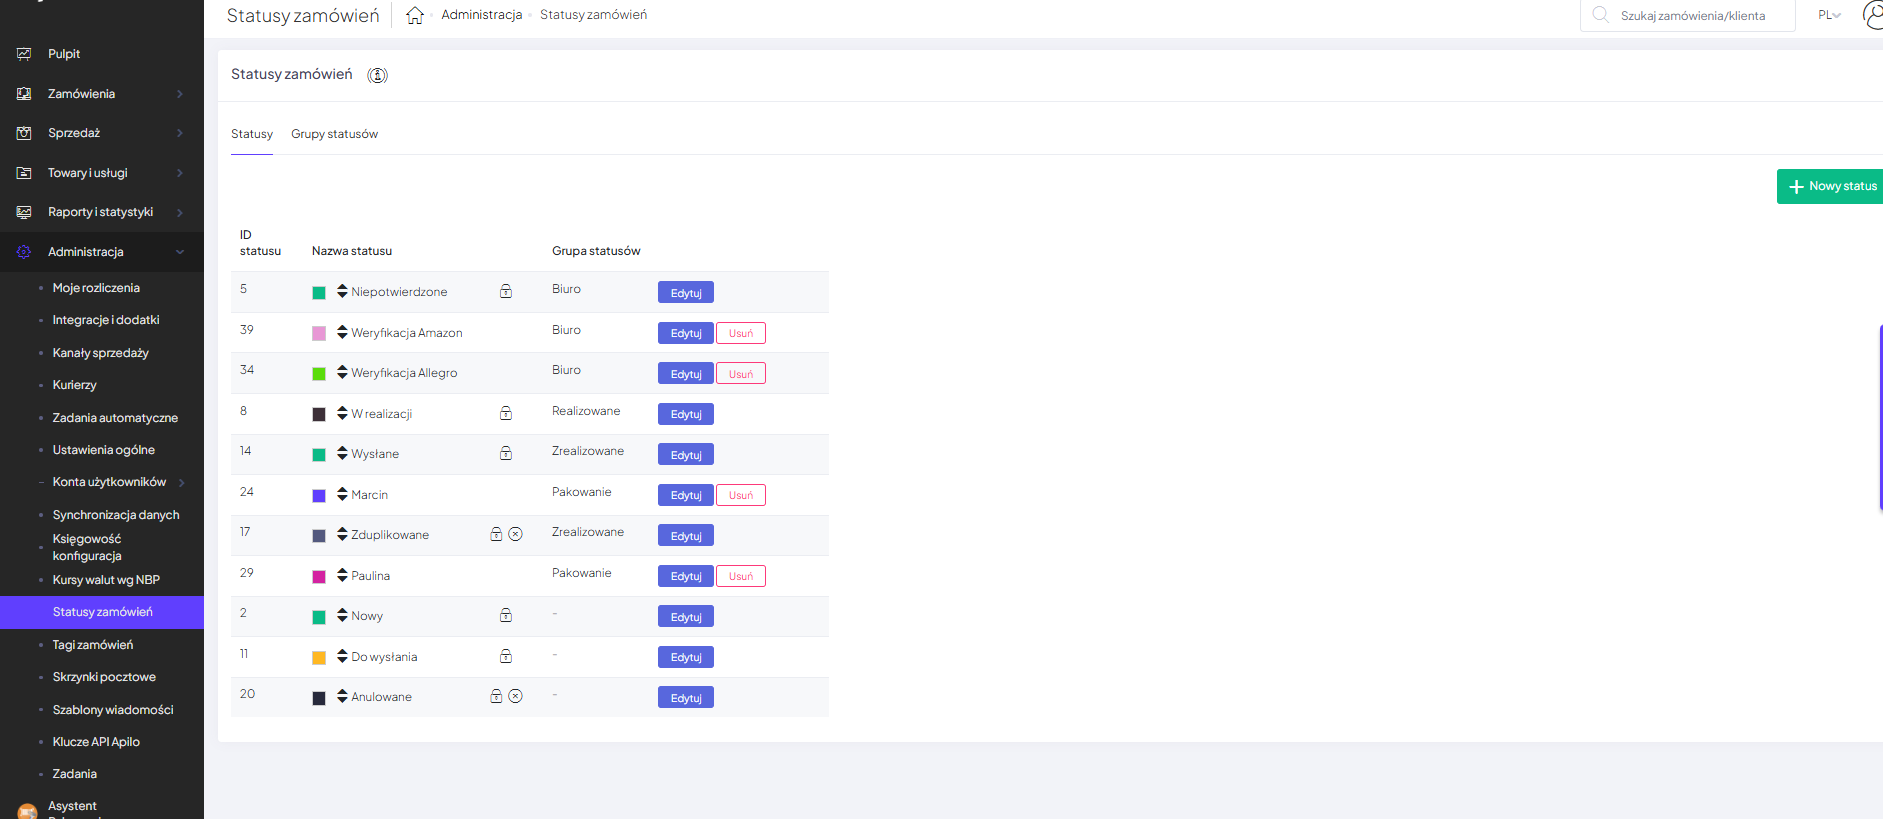 You can create any number of statuses and groups.By default, all orders are displayed, but you can select any group and status of the orders displayed. More information about creating groups and statuses can be found in the later part of the guide.The side column where the order statuses are located is movable. You decide which visibility of statuses and groups is useful for you while working in Apilo. You can expand only the group of statuses that interests you:
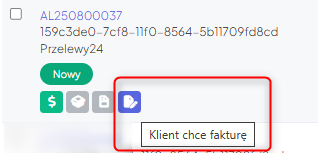
Orders visible on the order list with more than 4 products have the option to expand additional items: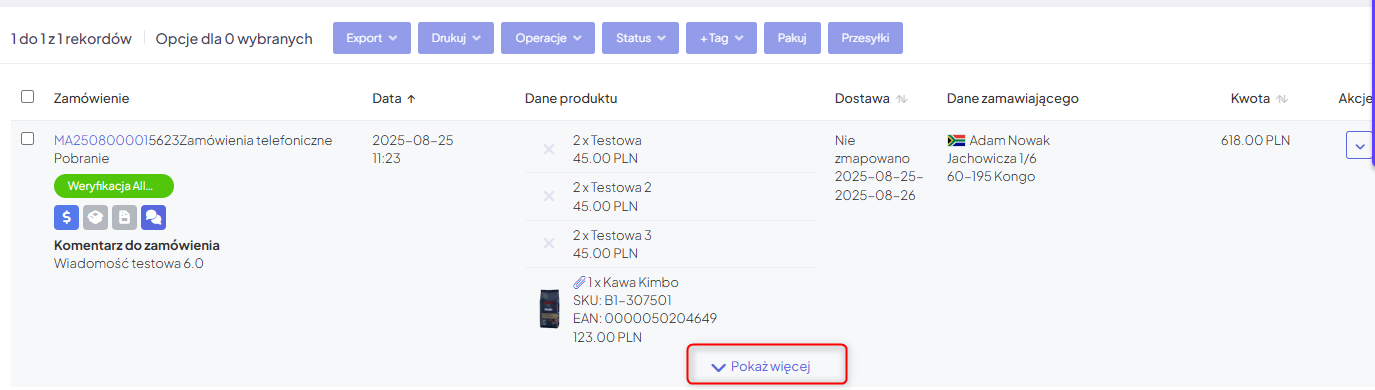 The order number displays its status. Intuitive, iconographic information visible on the order list will allow you to quickly identify such data as: payment in the order, notes from the buyer or seller, information about invoices or generated shipments. By hovering over a given icon, a full description of that icon will be displayed:
On the order list, the delivery method is bolded to enhance its readability:
From the available side actions on the order, there is an option to preview the order details, create a shipment, and package the order.
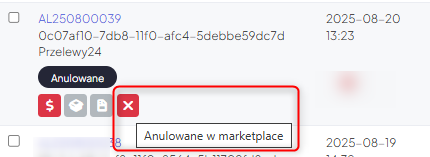
Generating a shipment is possible regardless of the status of the order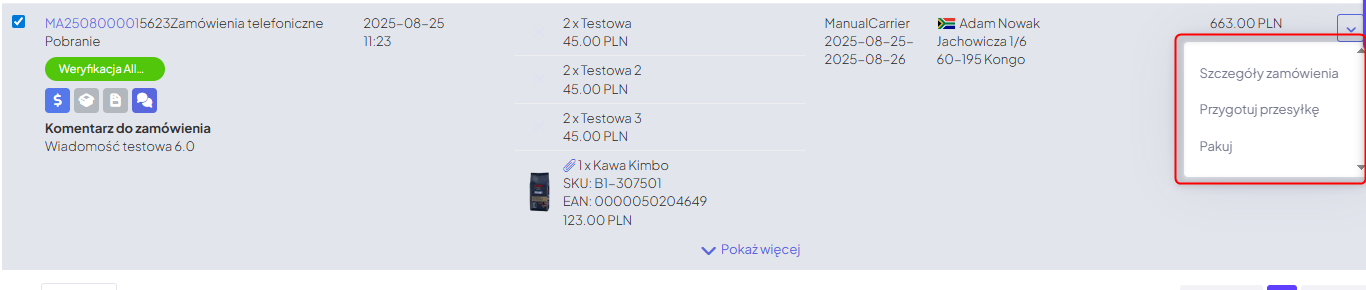 If the order is canceled by the buyer on Allegro, this will be indicated by the icon below:
You decide what is visible on the order list. Available options can be selected in the Administration > General Settings > Order List > Edit tab: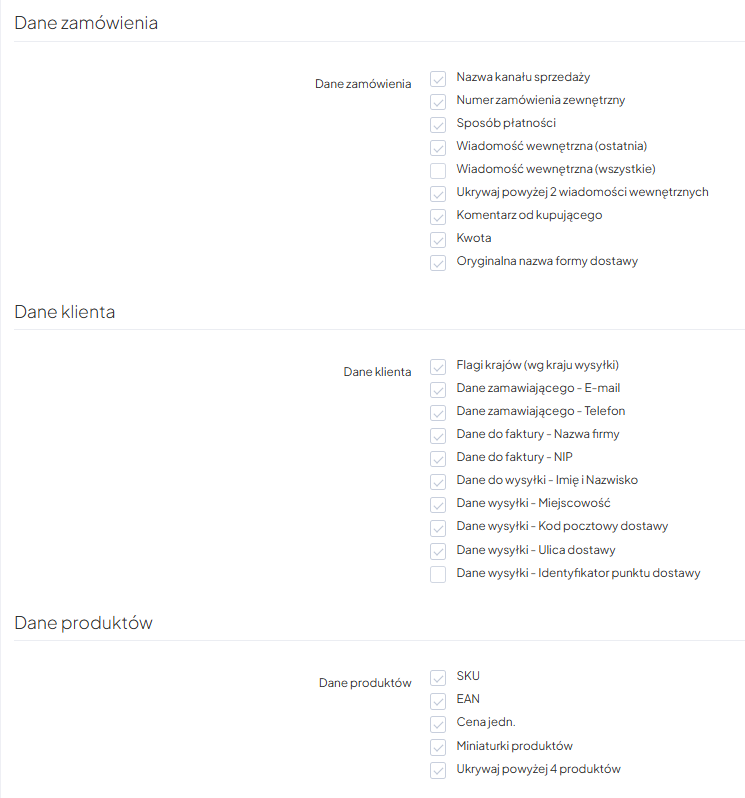
Attention!Editing applies only to the order list. In the detailed view of the order, all information is visible, regardless of what is checked in the Data Visibility Settings on the order list.
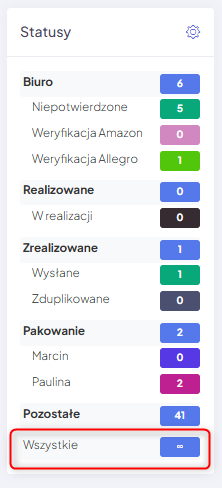
Search filters visible on the order list allow you to find an order that is currently in the selected status: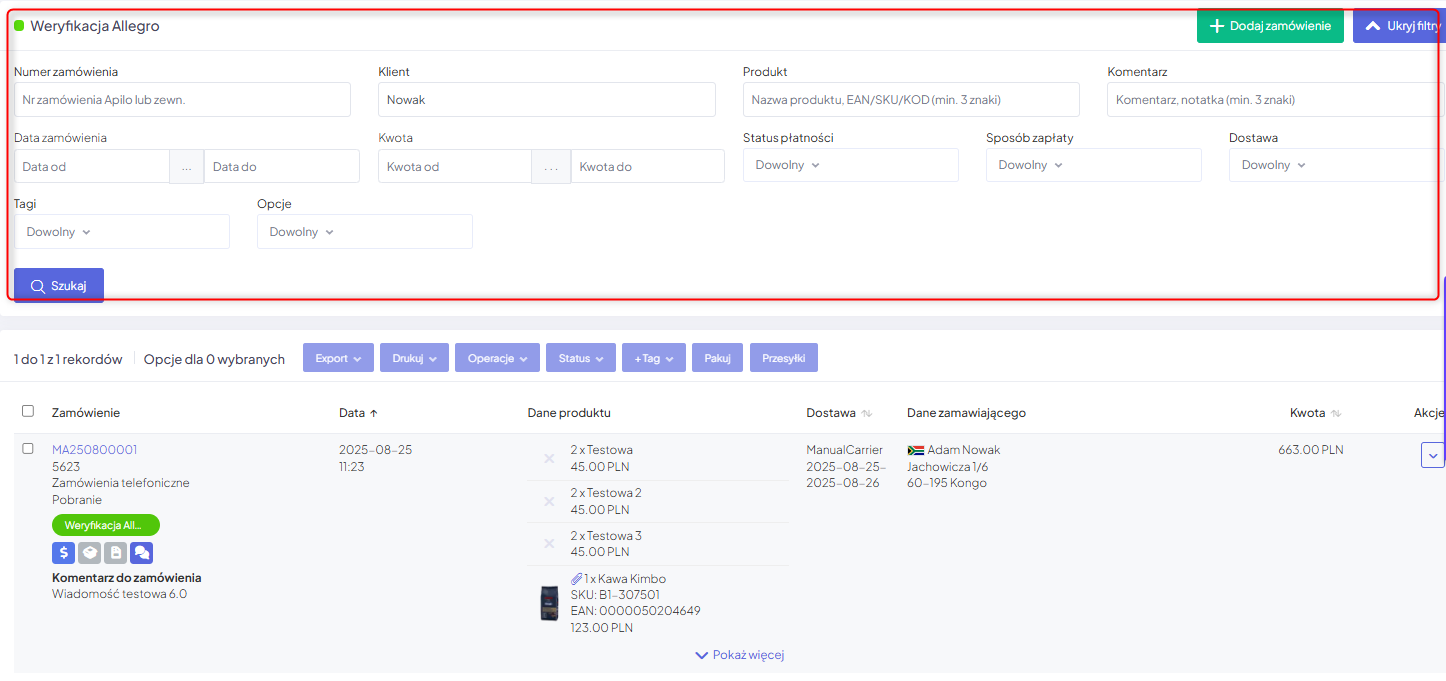 If you want to search for an order that is in a different status, use the ‘All’ status or the general search box in the upper right corner, which works independently of the currently selected status:
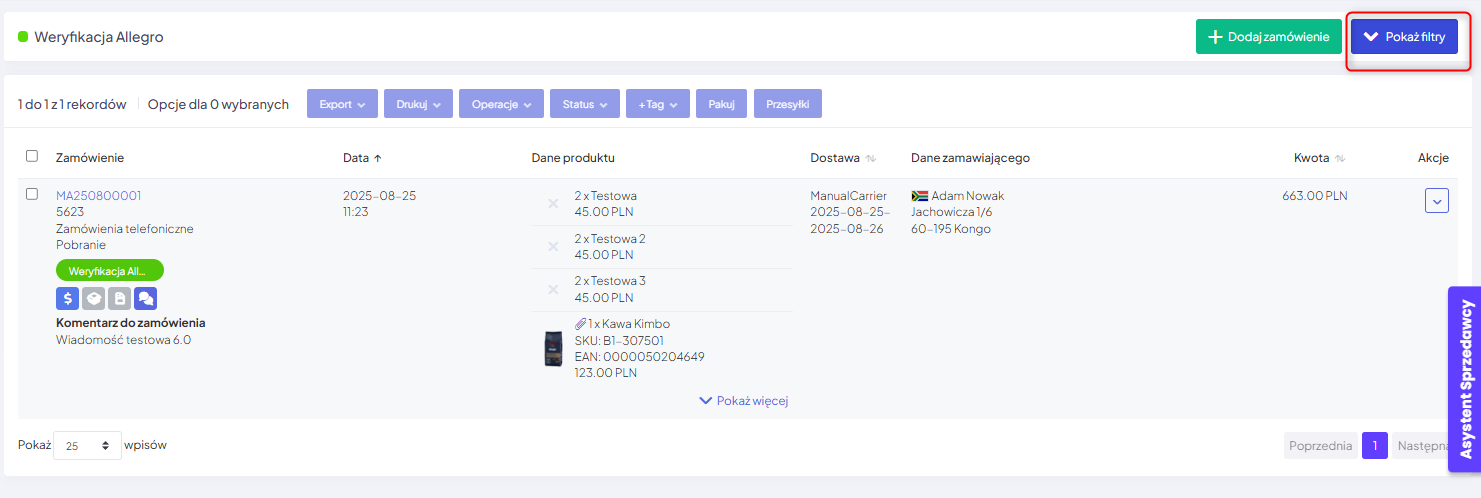
 On the order list, you can hide or display filters at any time:
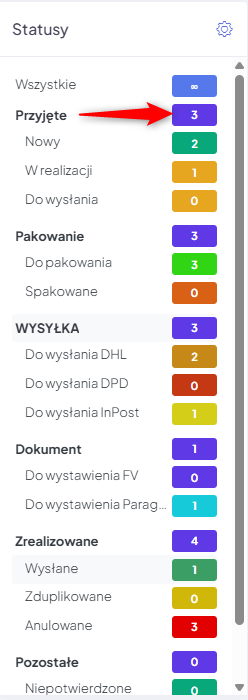
 If you want to search for orders from a specific status group, click the number next to the status group. The list will show orders in the statuses assigned to that particular group.
From the general list, after selecting an order of interest, the following options will be available:– export the order to a csv or xls file– print a detailed or shipping printout, as well as products to be allocated– operations such as: merging orders, internal message, refund of payment and commission (for orders from Allegro)– changing the order status – adding a tag to the order– option to package the order– generating a shipment – available in any status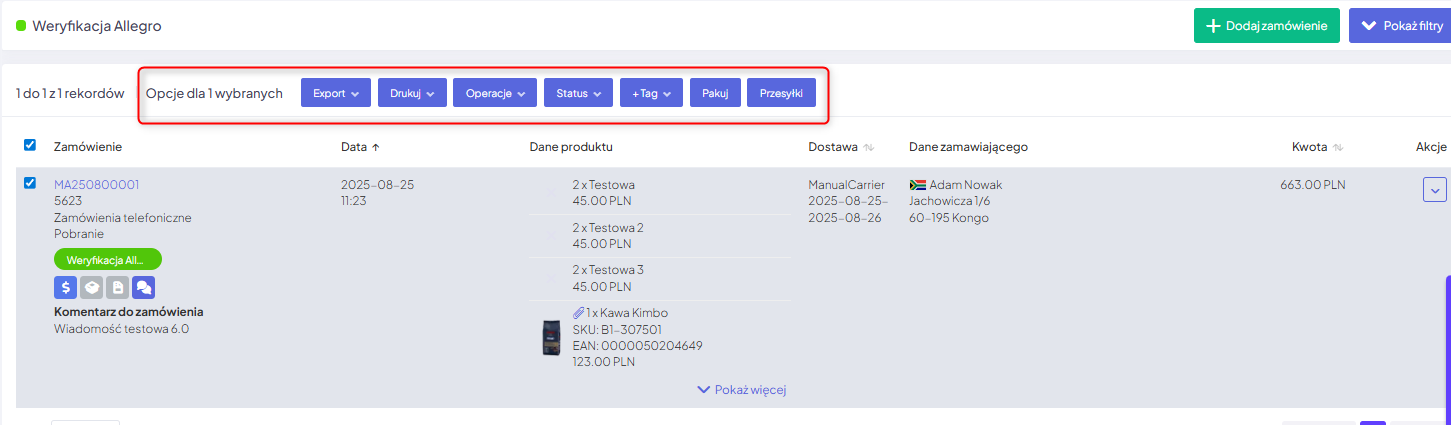 After clicking the ‘Shipments’ button, you will automatically be redirected to the label generation form.After generating a shipment, an icon of a box will appear on the order list:
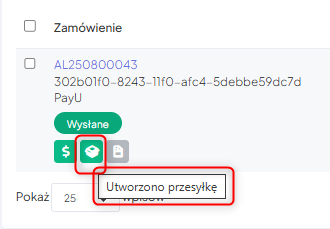
Intuitive, iconographic information visible on the order list will allow you to quickly identify data such as: payment status in the order, comments from the buyer or seller, information about invoices or generated shipments. Hovering over a specific icon will display a full description of that icon. Below we present the available icons along with their designations:
Payment status:
- no payment

- partial payment

- payment settled

- payment on delivery


Shipment in the order:
- generated

- no shipment


Sales document:
- invoice issued

- receipt issued

- no sales document issued
- customer requests invoice for the order


Note/message/comment on the order:
- the order includes a note/message/comment
- no messages in the order


Alert for the order:
- canceled in the marketplace

Creating groups and order statuses:To create groups and order statuses, you need to go to the Administration tab > Order Statuses: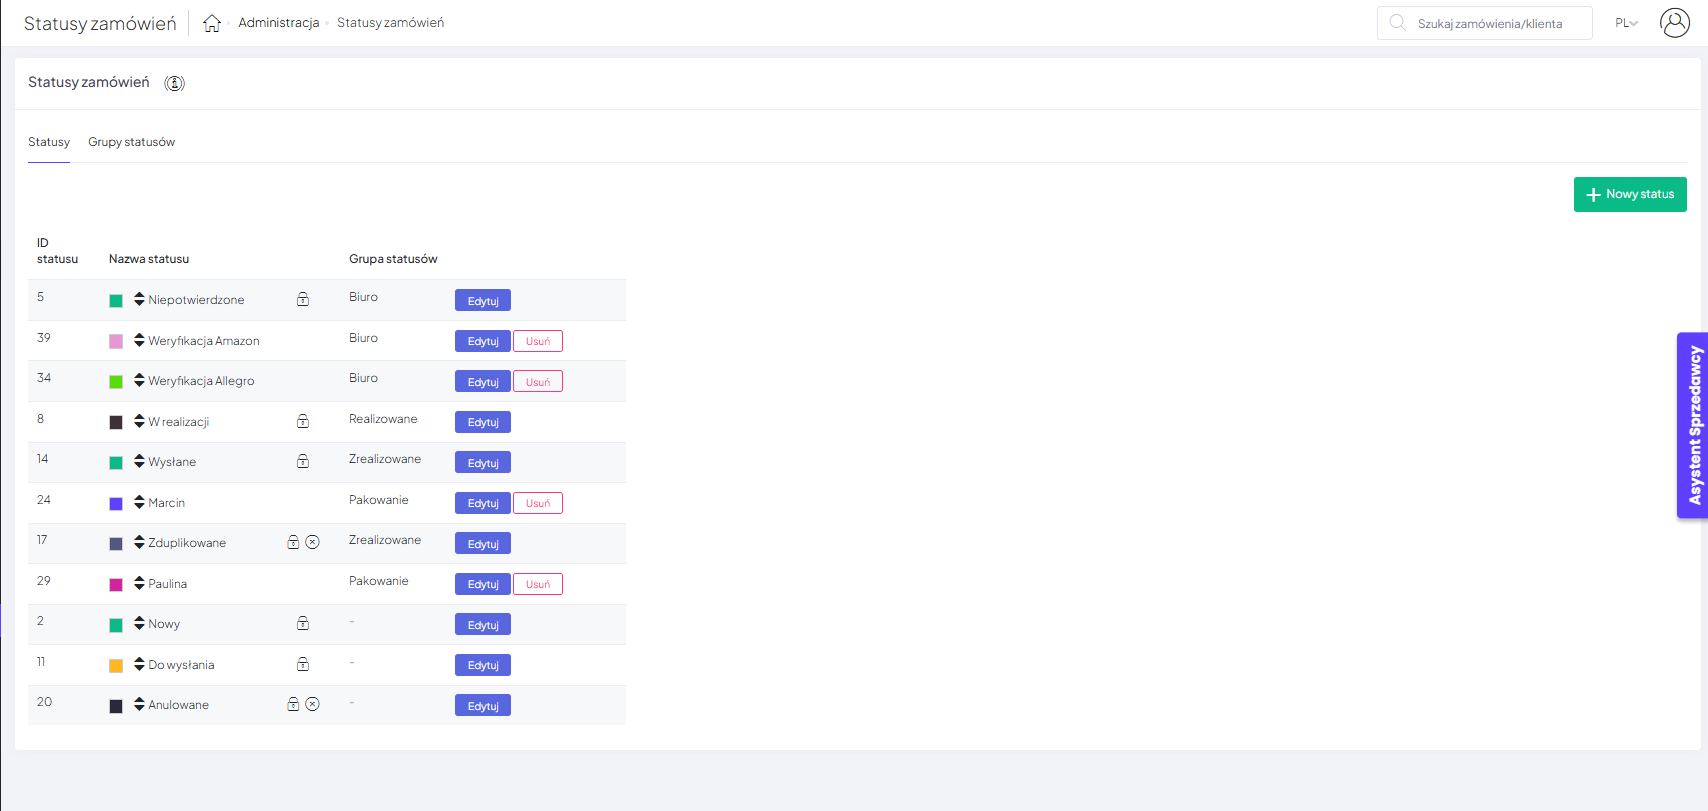 Default statuses with a visible icon cannot be deleted or deactivated. The name of the default status cannot be changed either. However, you can assign your preferred color, select the group in which the status should be visible, and choose whether cancellation should affect stock levels and order reports and statistics.For orders with the status “Cancelled” and “Duplicated,” it is set by default whether cancellation should affect stock levels and reports and statistics. This information is indicated in the list of statuses by an “X” icon. Options can be changed according to your preferences:
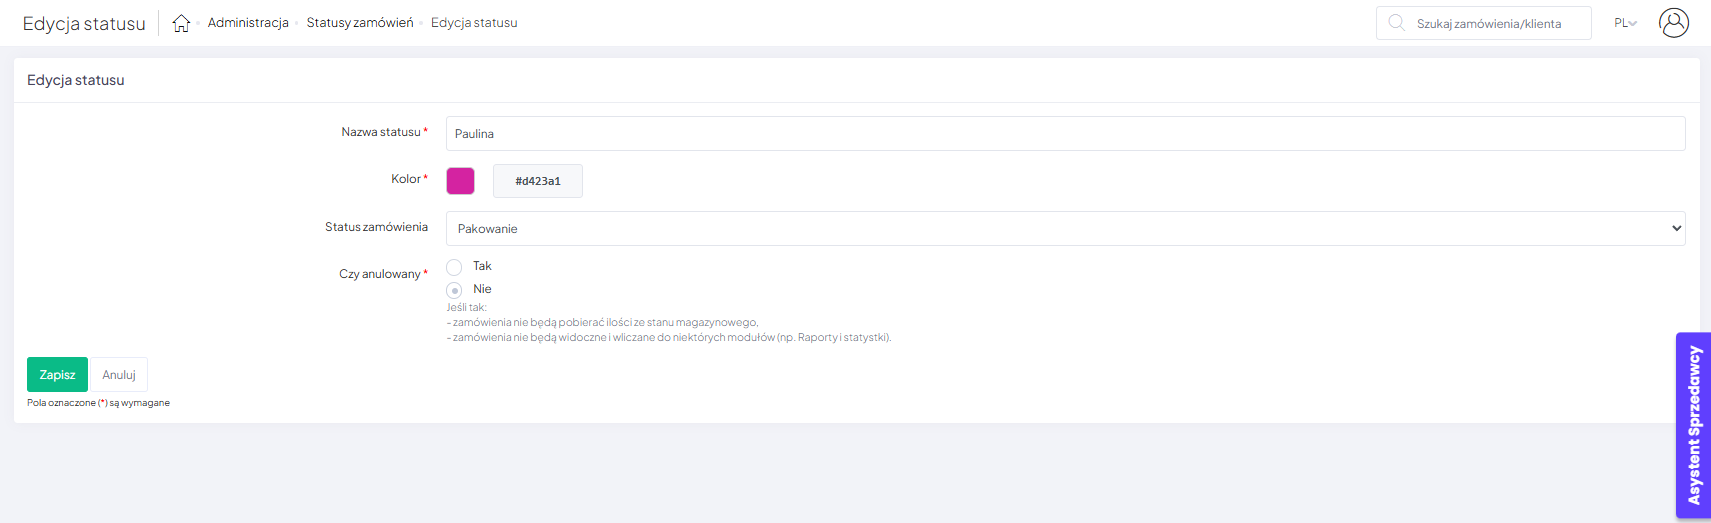 To create your own order status, click the “New Status” button:
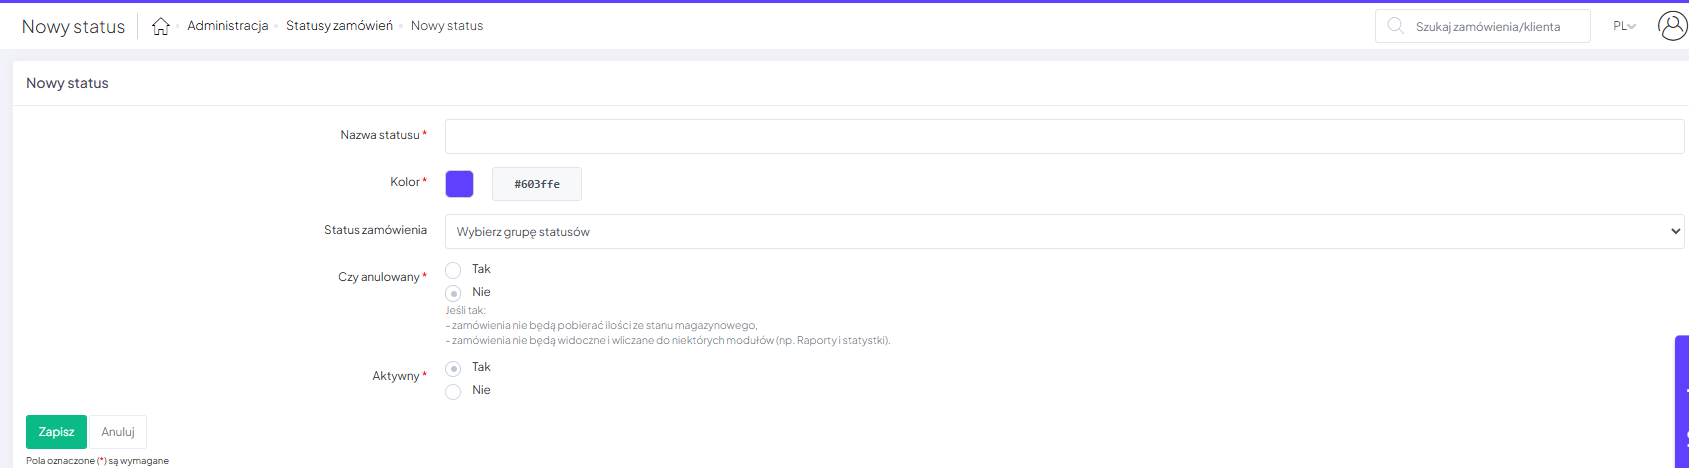
 A form will appear where you can assign a name, choose a color, assign the created status to a selected group, change cancellation information, and enable the visibility of the status:
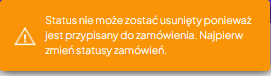
 At any time, you can delete the status you created or change it to inactive, provided there are no orders associated with it. If there is a need to delete a status that has orders, a protection message will be displayed:
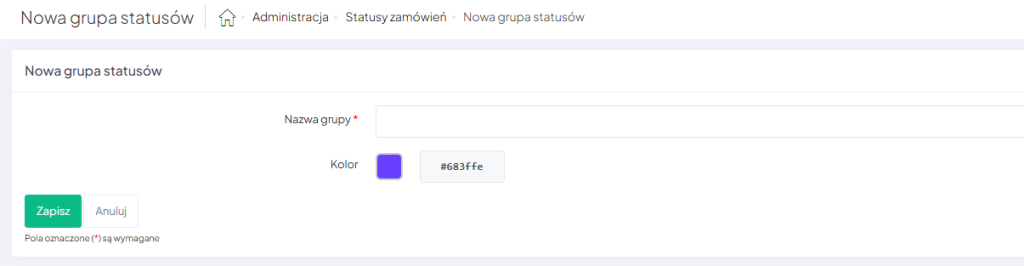
In case of changing the activity setting of a given status while there are orders in it, the option will not be possible to change.You can create any number of status groups through the tab: Administration > Order Statuses > Status Groups > Add Status Group: A form will appear where you can assign a name and choose a color:
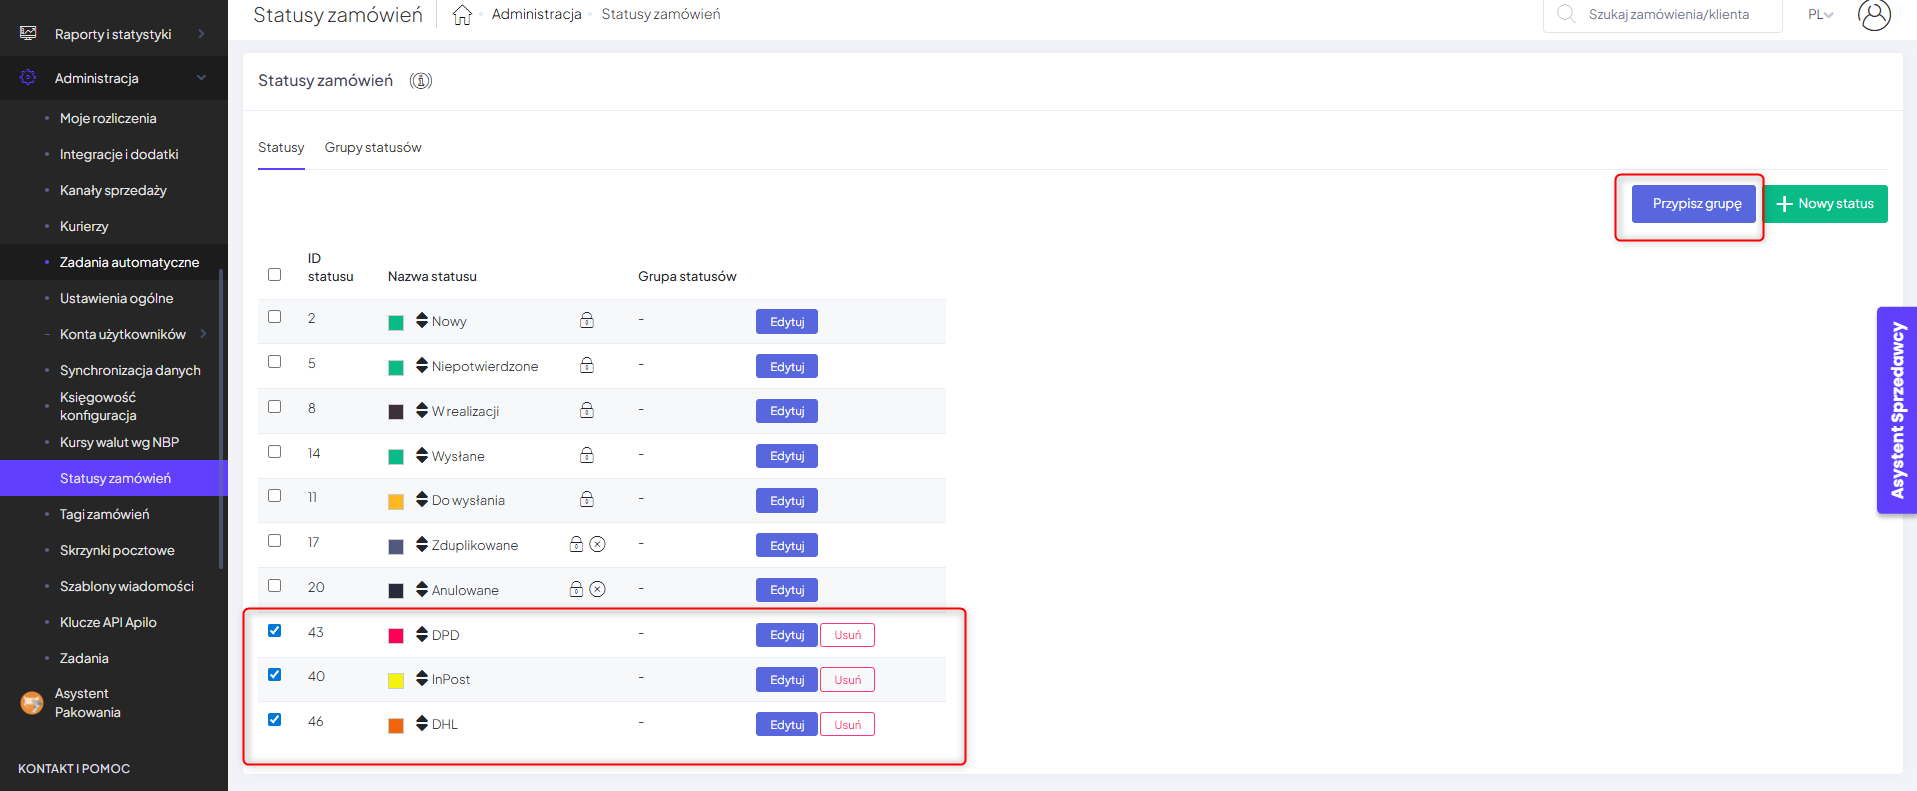
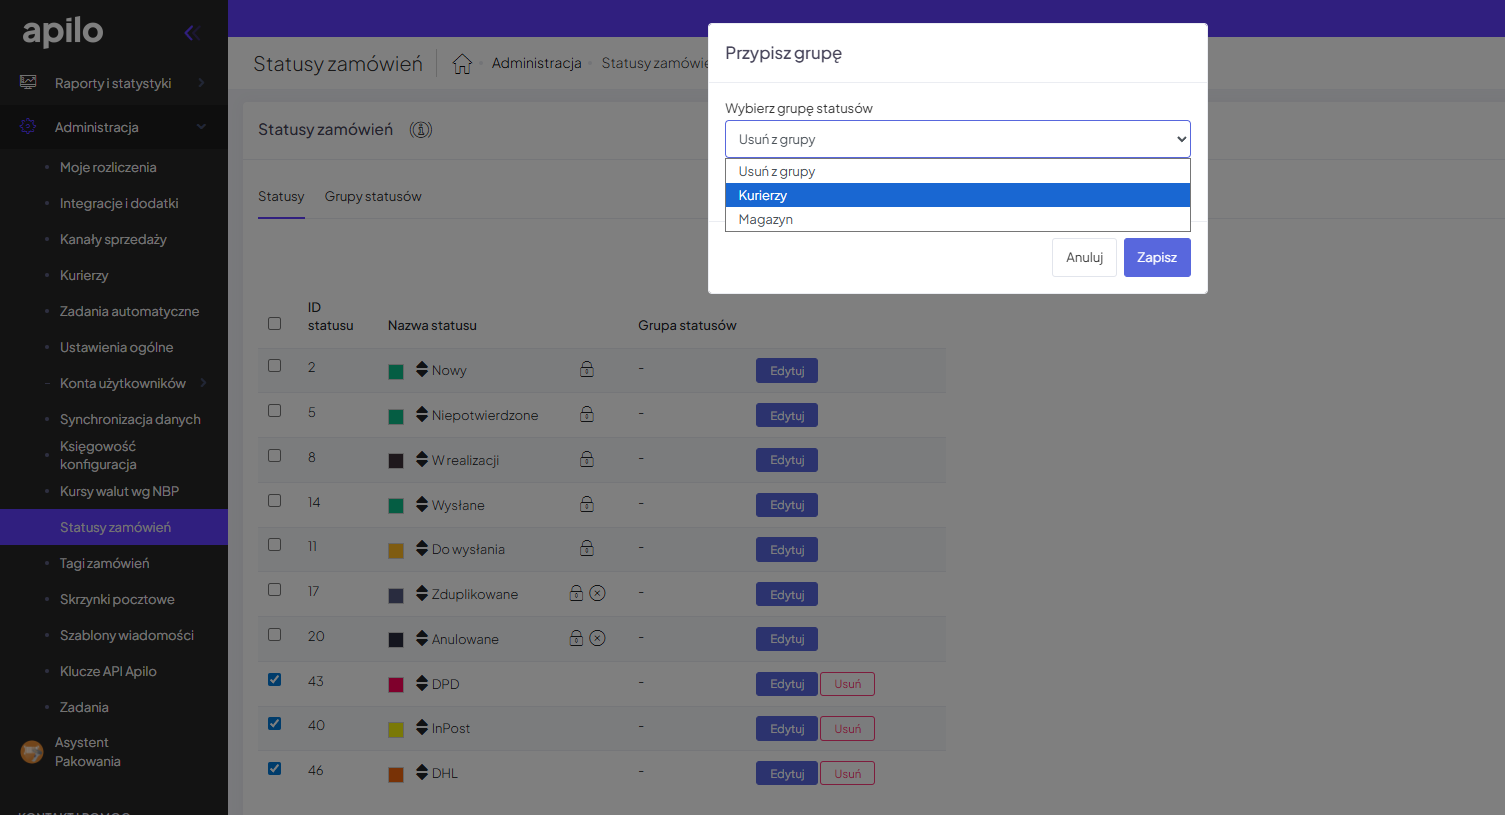
 The system allows you to mass assign selected statuses to a dedicated group. To do this, select the statuses you want to move in bulk and click “Assign Group”:
 Choose the group to which you want to assign the given statuses and click “Save”:
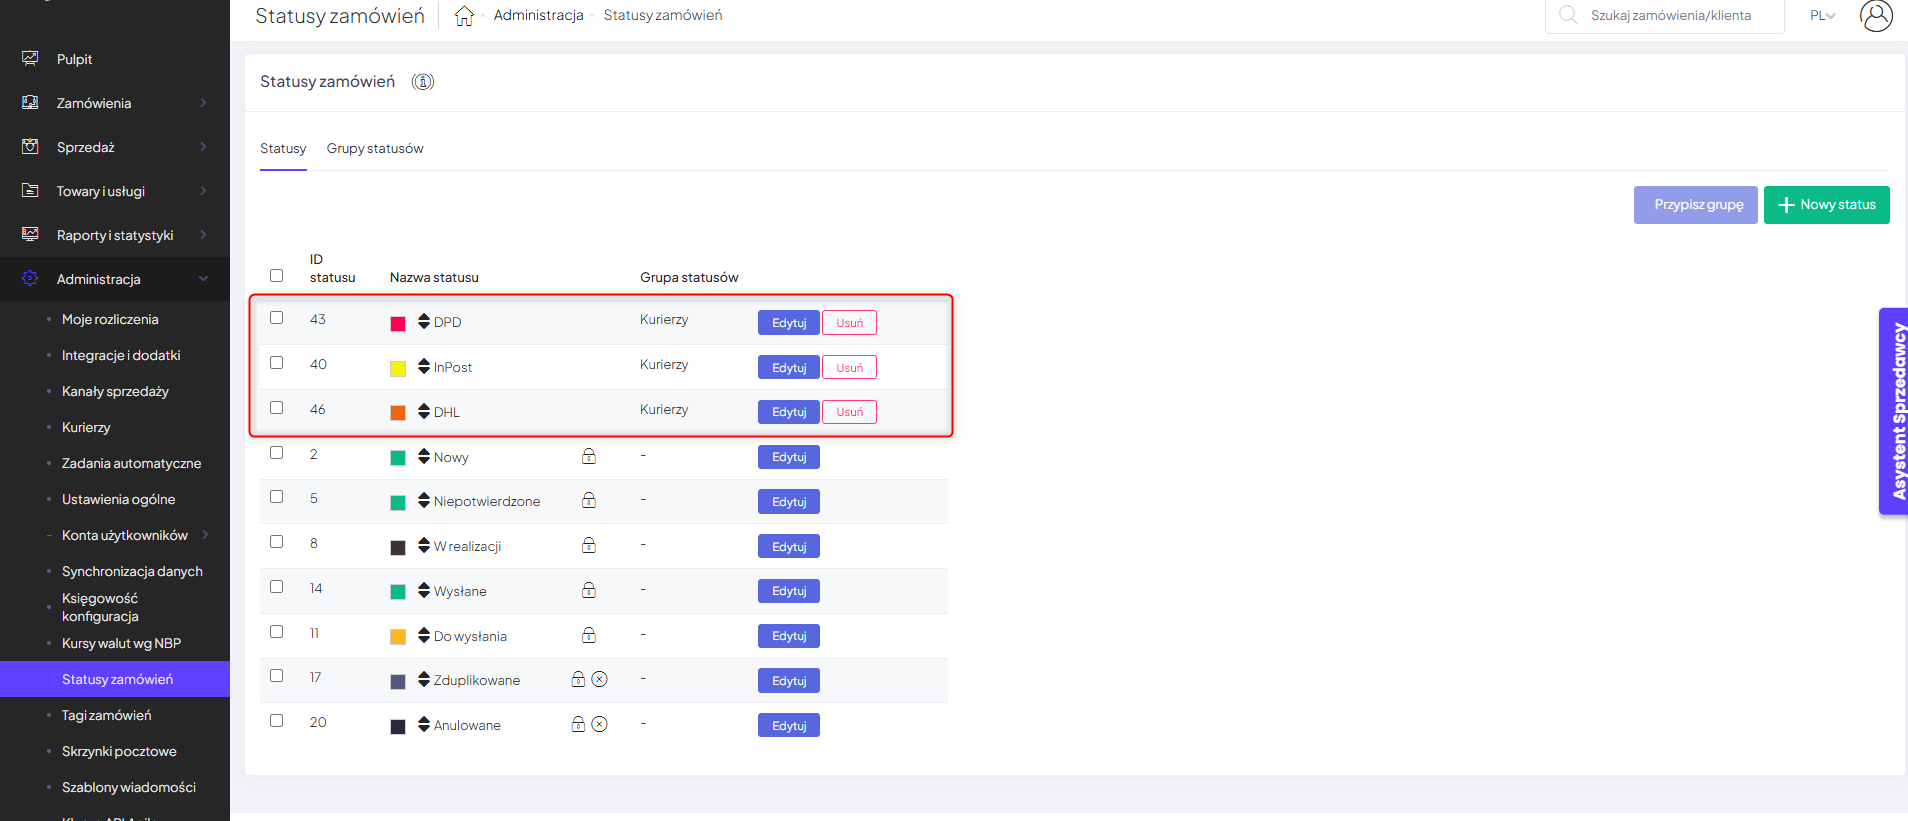
 Statuses will be moved in bulk to the designated group:
 At any time, you can delete the added group or change its name. All groups and order statuses you have added are visible in the sidebar in the tab: Orders > Order List:
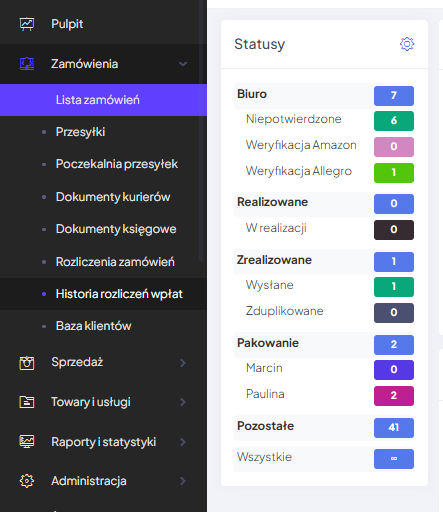
Using the slider icon, you can change the order of statuses in a given group on the list:
Remember that, in this case, the order of status groups takes precedence:
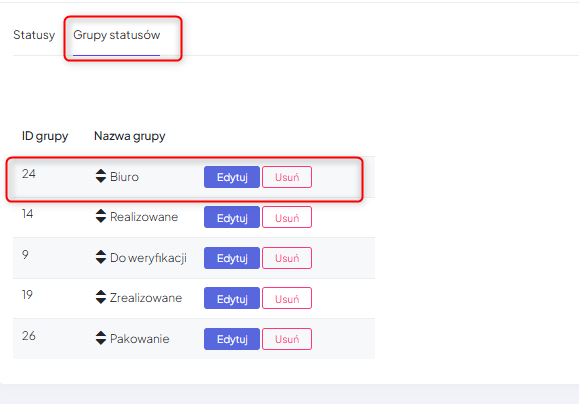
If you change the order of status groups, the sequence on the status list will also be changed: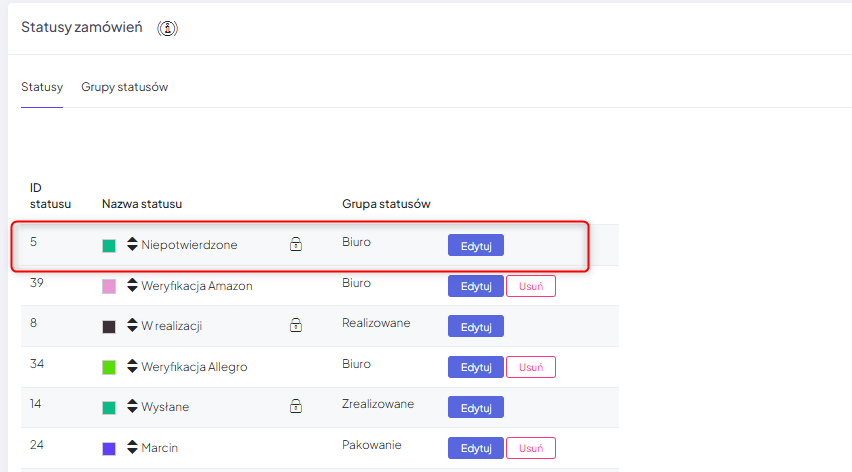
If you move a given order to another status, the count will change for both the assigned status and group.When you delete a given group, the order statuses will automatically appear in the default group “Others”:
After clicking on the order details in the order list, all necessary data will be visible: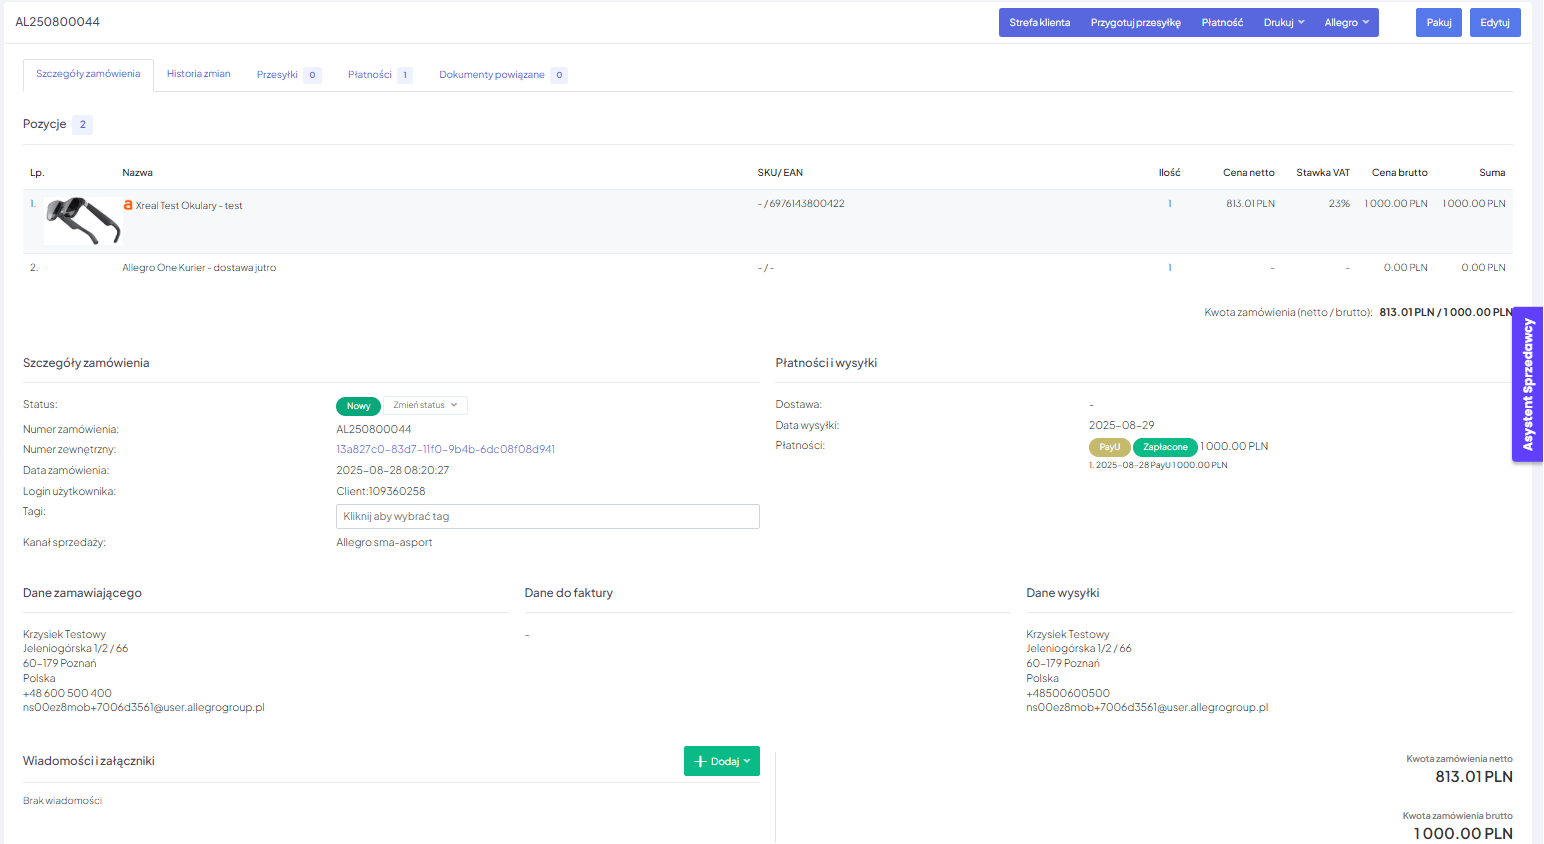 From the order details level, it is possible to change the order status. Expanding the list will show all possible statuses to choose from:
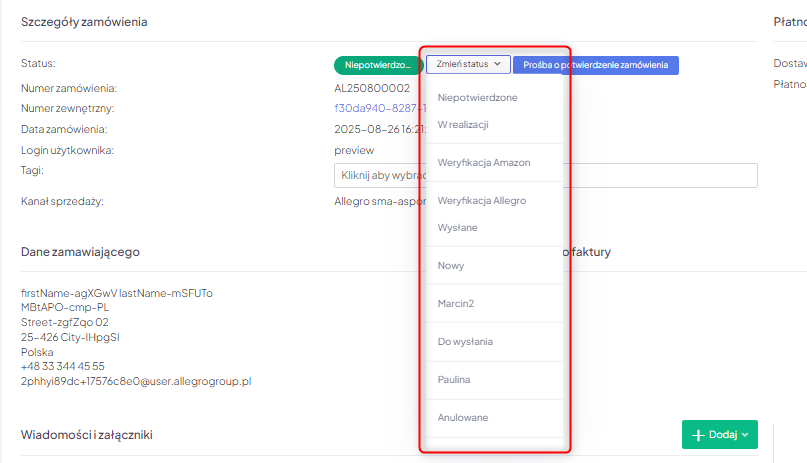
Orders in the “Unconfirmed” status can be modified by the buyer. In the case of Allegro, the order will be automatically confirmed after the buyer pays for it (at this moment, Allegro will block the ability to make changes), which will cause the status to change to “New”.Manually added orders may require confirmation by the buyer – you will have the option to send an email requesting to verify the data. After confirmation, the order will automatically change its status to “New”.
Note! We do not recommend making manual changes and processing orders that are in the “Unconfirmed” status.
In the case of an unconfirmed order, there is an option to send a request to the client for order confirmation directly from the order panel: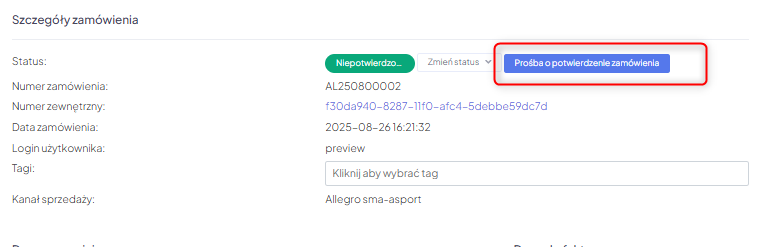
After clicking the button, the option to send a message to the buyer will automatically appear after selecting the preferred message template and mailbox: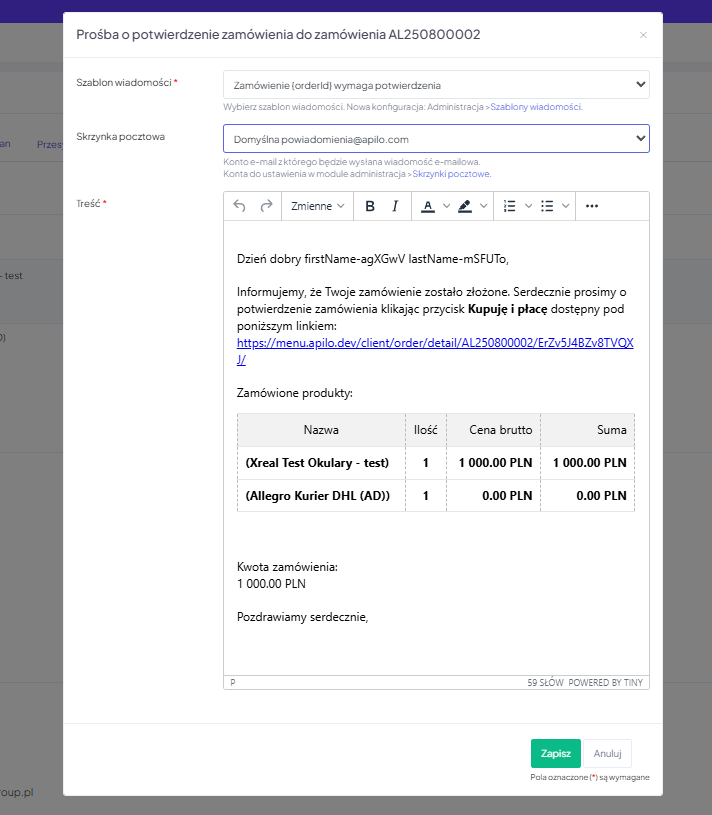
From the order details section, there is also the possibility to add a message and an attachment, either internally or externally to the client: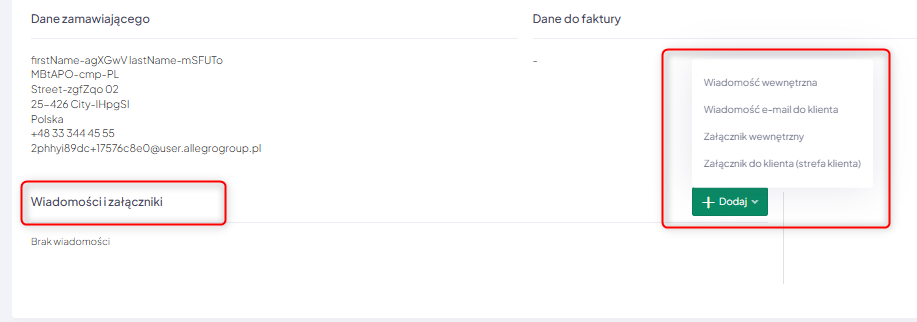
There is also a visible history of all changes in the order, information about generated shipments, payments, and related documents (including sales documents):
From the order details level, you can view the client area, generate a shipping label, add a payment to the order, print a detailed printout, and shipping printout, process a return of payment or commission for orders from Allegro, pack the order and edit it:
This guide has been translated using AI-powered tools.
Still need help?
Talk to a support agent
